

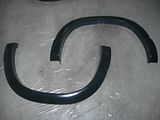
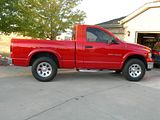
I took some pictures as I was painting my eBay fender flairs, so I figured I would offer up a how-to on how I painted them on a budget. It really is something that just about anyone can do if you have some patience and do not mind exerting some elbow grease. The benefit is that you save some money, you do not need any fancy painting equipment and you can re-paint one pretty easily if the paint becomes damaged for whatever reason because now you know how to do it ")
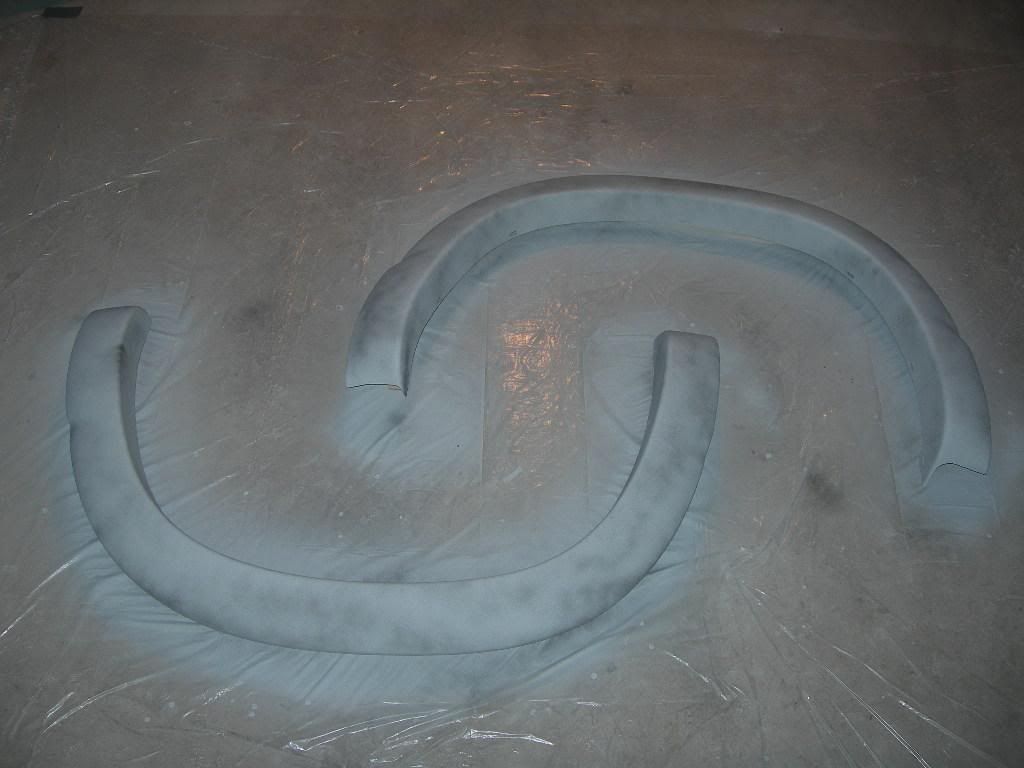
I painted the "smooth" version of the flares, which are not actually perfectly smooth - they still have a texture. The texture filled in just fine with some build-up primer, so no actual sanding of the flares was needed. If you were to purchase the "textured" version of the flares, or if you wanted to try this same technique on other parts of the truck with a texture, such as the door spears or mirrors, you would probably have to sand those first - or use lots of build-up primer.
I was fortunate that the Dupli-Color Truck/Van/SUV paint in Flame Red matches my truck very well, but I can not say how well other colors would match. All you can do is paint a test piece and see how it looks. I would suggest doing a full color/clear coat/wetsand/buff of the sample since the color can look different with or without clear coat and with or without the final sand/buff. I painted a small part of one of the old stock wheel well liners I had after I installed the full liners to test the color match.
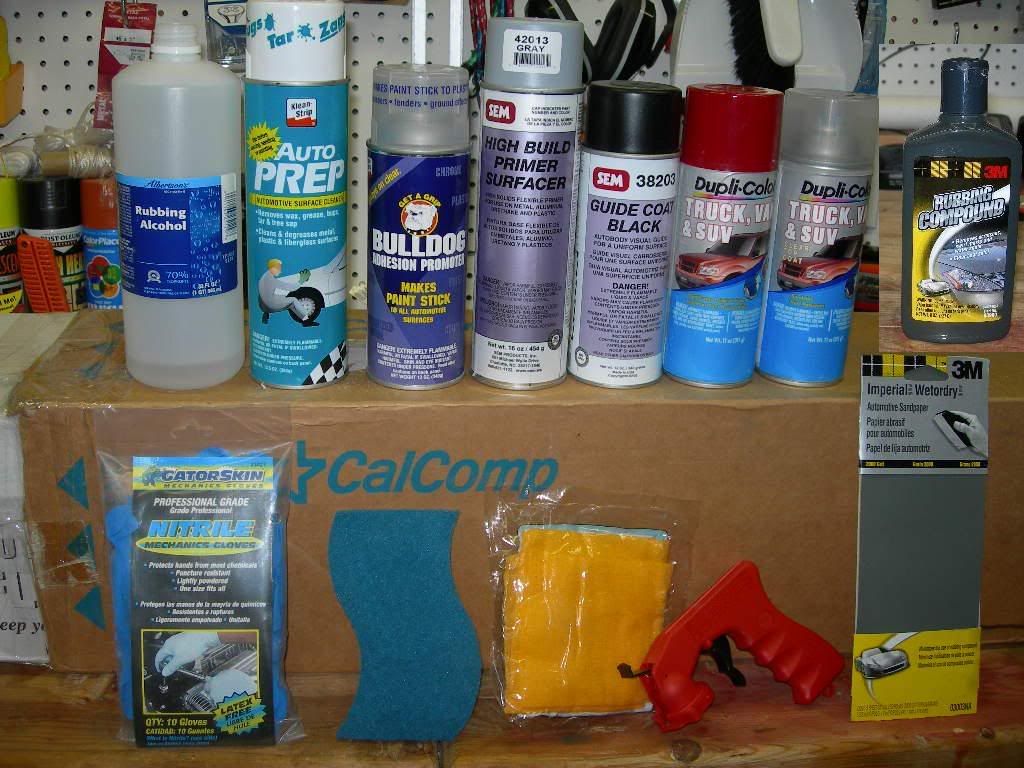
OK, so this first pic shows all the products I used. These are a must:
1. Rubber gloves, scotch brite pad, tack cloth, several white cotton towels. I used a 12 pack
of 18"x18" or so towels from the auto store.
2. Dawn dish soap, Rubbing Alcohol, Wax/grease remover (Auto prep in the picture)
3. 800 grit sand paper (few sheets)
4. 2000 grit sand paper (at least one sheet per flare)
5. 1 can of Bulldog adhesion promoter, or an equivalent (makes the paint stick to the plastic)
6. 2 16 oz cans of SEM primer (I used high build primer/surfacer since I was not sure how hard it would be to fill the texture in these "smooth" flares). Dupli-Color Truck/Van/SUV primer would work fine as well now that I have done it, but you would probably need 3 12 oz cans vs the 2 16 oz cans that I used. If the flares truly were smooth, then no primer at all would be needed.
7. Dupli-Color Truck/Van/SUV paint (I needed 4 cans of flame red (poppy red))
8. Dupli-Color Truck/Van/SUV clear coat (I needed 4 of those as well)
Optional
1. $4.00 plastic trigger to make spraying the rattle cans less fatiguing
2. 1 12 oz can of SEM black guide coat (or a different color of primer if you have some). I will talk about that below
I picked up the high build primer and guide coat from a local Sherwin Williams auto paint shop, but the rest of the items except for the Bulldog adhesion promoter I picked up at the local Checker Auto parts. I already had the Bulldog from prior projects, but a local auto paint store should have it, or you could find it online. A can lasts for a while because you only need a couple light coats on whatever you are painting.

OK, so the first step is to get a small bucket with some very hot water and a capful of Dawn dish soap. Throw on the rubber gloves (any time you are handling the flares actually) and clean each flare with the scotch brite dipped in the soapy water. You are mainly trying to clean the flares and "scuff" them a bit, but that is about it. Spray them off with a hose, wipe them with a towel and let them dry.
Next get a clean cotton towel and pour some alcohol on the rag and wipe down each flare. Let them dry again and get yet another clean towel and spray some auto prep on the towel and wipe down each flare. I guess the three different types of cleaners on the flares remove different types of containments. Not sure how important this is on new plastic, but it is important for plastic parts that have been on the truck for a while, such as mirrors, spears, etc. If you do not clean them first, and you wanted to sand down the texture, you can embed contaminants into the plastic. I figured what the hey and just used all three.
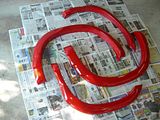
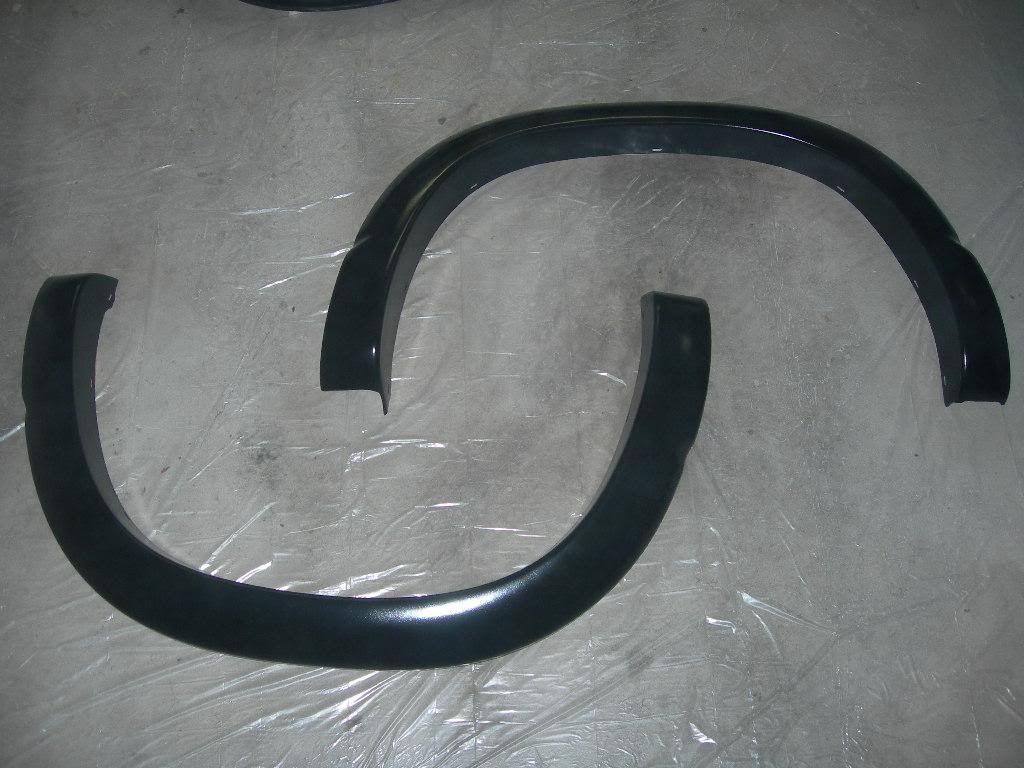
I set the flares on wood blocks so they were off the ground a bit and finally I sprayed two very light coats of Bulldog adhesion promoter on each flare, waiting about 10 minutes between coats. They emphasize that more is NOT better with this stuff. Here is a pic after the Bulldog:
After about 10 minutes, you can spray the primer. I sprayed a light to medium coat then a couple more medium coats again waiting about 10 minutes between coats.

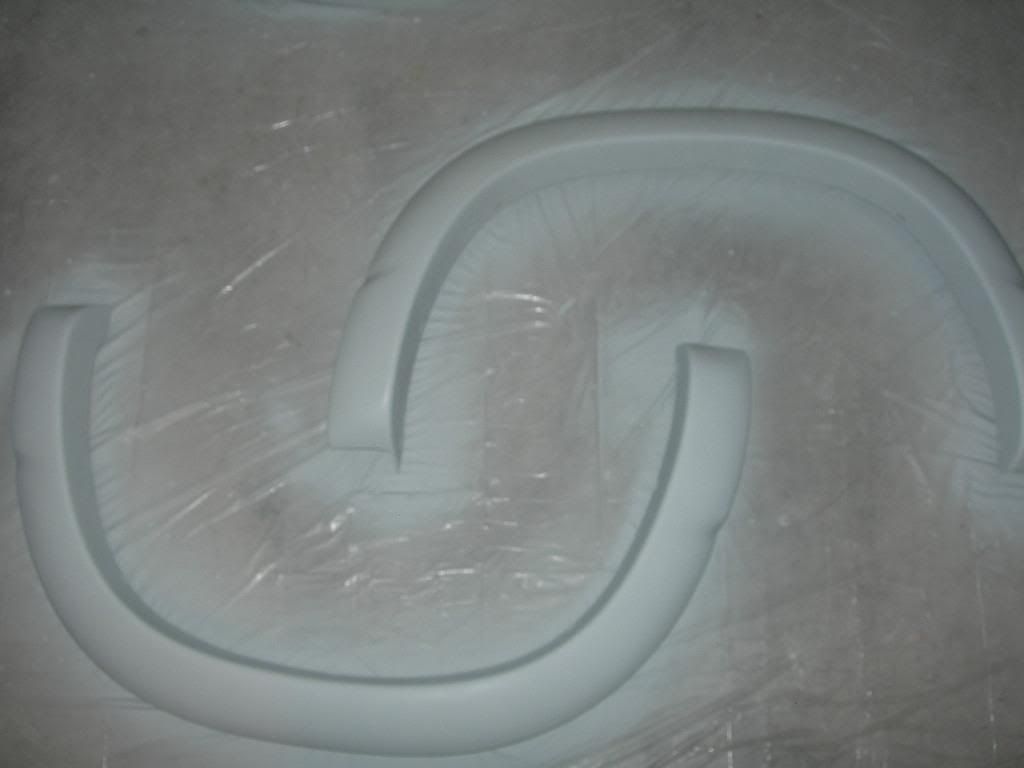
This step is optional, but was a neat tip I saw on Dodgetalk and elsewhere. If you spray a "mist" coat of contrasting color paint on the primer, it will aid (or guide) you by preventing you from sanding too much of the primer. If you sand just until that contrasting color is pretty much gone, you know you can stop. I bought a $5.00 can of guide coat, but I would think any contrasting primer (red, black, etc) would work just as well. You also do not have to bother doing this step at all if you feel pretty confident of your sanding ability. Here is what it looks like after the guide coat:

I let the primer/guide coat dry for about an hour, then I wet sanded the flares with 800 grit paper. They say 400 grit can be used, but again I was being conservative. I did not bother sanding off all the guide coat - I just pretty much sanded them until they felt pretty smooth. The guide coat just helped me from going too far.
After that I wiped off the wet flares with a new clean towel, let them dry and wiped them down with yet another towel soaked in some wax/grease remover. One thing I noticed, however, is it was hard to paint the sides of the flares when they were so low to the ground, so before I started the red/clear coats, I decided to get some saw horses with some 2 ft or so 1x2s clamped vertically to the horses. I then set the flares one at a time onto those 1x2s (I usually needed three 1x2s - two on one horse and one on the other) and painted them up at chest level, rather than 2" off the ground - much easier.
For the red, I set a flare up on the 1x2's, wiped it down with a tack cloth, then started painting. I did a light coat followed by a couple of medium coats waiting 10 minutes between coats. Since the flares will have a clear coat, do not worry too much about how many coats of red you are putting on - as long as you have a good even color on the flares and none of the primer is showing through that is really all you need. I painted them one at a time and let them sit for about an hour.
One thing you have to watch out for is if you are using one of those plastic triggers for the spray can, some paint can build up on the platic around the spray head and can drop onto the flares. I kept a towel with me and periodically blotted the nozel area to get rid of that buildup. The trigger did work very well - I felt like I could hold the can in a more natural position.
At that point you could wet sand them a bit with 2000 to smooth them out, but I did not bother. If you do get a run or two - don't sweat it, just let them dry for about an hour, then carefully wet sand the runs with 2000. If the paint gets a little too thin, just spray a couple of more light coats of paint in that area, let it dry again and lightly wetsand to blend it in. Again, you do not have to be perfect - it is the final wetsand of the clear that really matters.
After the red is ready and looking pretty good, I just wiped them down again with the wax/grease remover and tack cloth and started spraying on the clear (again waiting 10 minutes between coats). I started with a light coat, followed by a medium coat, then followed by at least 2 medium to heavy coats. The heavier you can make the coats the smoother the finish will be, which means less final wet sanding. Again, if you get a run or two, do not sweat it - it can be sanded out. The more clear you can get on the flares the better since that makes it more forgiving if you sand a bit too much in one area. I was getting better at judging how much paint I could put on as I did each flare and so the last one was quite a bit smoother than the first one (less orange peel), and it was easier to wetsand as well.
Here are the flares after the red/clear coats (those orange spots are the sun reflecting off the flares into the camera):
I then let the flares dry for a day before I started the wet sanding with 2000. I have read that 1200 to 2000 can be used, and if I did it again, I would try 1500 at least if the final clear coat has a pretty good orange peel to it. The 2000 is very safe to use - it just takes longer to get there if you want most of the orange peel removed.
What I did was had a towel handy and as I wet sanded a section of the flare, I would wipe it off and see how the orange peel was coming. I kept at it until most of the orange peel was gone, but to be honest, if you only sanded 75% of the orange peel and rubbed it out, the finish would look at least as good as the OEM paint. Also be careful sanding on any of the edges - I tried to sand up to the edge from both sides and then just lightly sanded the edge itself. I guess the paint tends to be thinner on the edges, so you have to have a lighter touch.
I also only sanded about 50% of the peel on bottom side of the flares since the finish is not as critical there. It still buffs out very well, just not as glossy as to top side. If you have the desire to make it all glossy - go for it!
After all the flares were sanded, I rubbed them out by hand using the 3M rubbing compound. Note that this is NOT the same as that rubbing compound in a can - it is very fine and works well for hand buffing. I just put a nickel sized blob on a clean towel and worked about a 6" section at a time. I was able to buff out each flare in about 3-5 minutes. Again, some elbow grease was all that was needed. I could have used an electric buffer if I had one, but I did not, and since this is a budget how-to ... well you get the idea
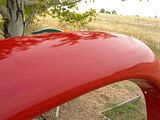
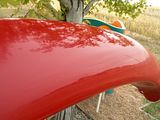
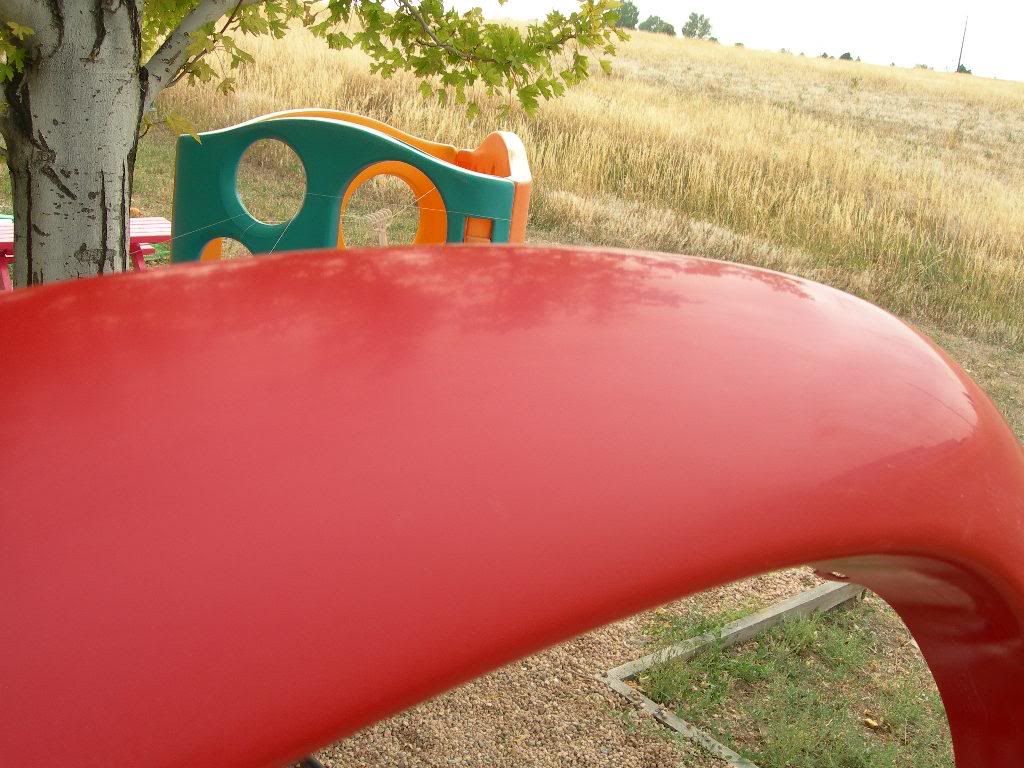
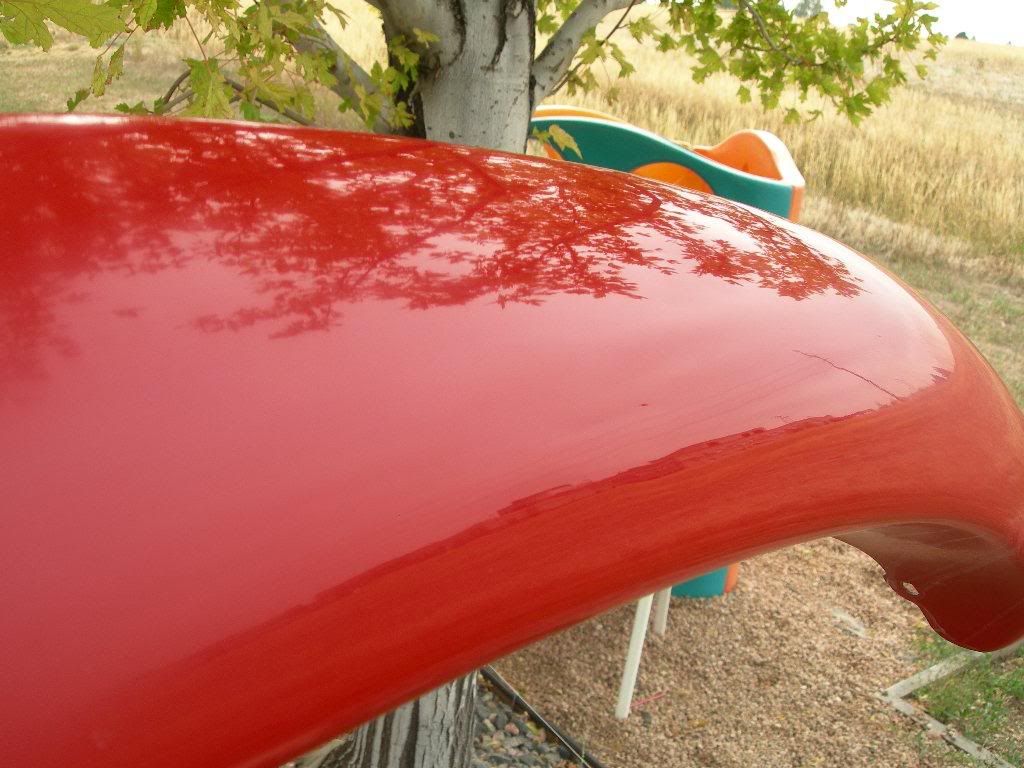
Here are some pics of the flares after red/clear, after wetsanding and after hand buffing. Note the reflection of the building and the power wires that are about a 1/2 mile away - the finish is as good as I could have asked for.

After that I just let them dry for a few days in my garage before I installed the rubber seals. You may need to wet sand back to the bare plastic and use some wax/grease remover (like I did) on the backside of the flares in the area where the rubber seal has to stick to the flares with 3M tape. I had some overspray in that area, and I wanted to make sure the tape would stick well. After that I mounted them on the truck and they fit just fine. Even though Dupli-Color does not mention it, I try to wait a couple of weeks before waxing the new paint. Here is how they turned out:
Now - how they will actually hold up only time will tell. So c'mon - go for it and to steal a popular DT slogan ...
I painted the "smooth" version of the flares, which are not actually perfectly smooth - they still have a texture. The texture filled in just fine with some build-up primer, so no actual sanding of the flares was needed. If you were to purchase the "textured" version of the flares, or if you wanted to try this same technique on other parts of the truck with a texture, such as the door spears or mirrors, you would probably have to sand those first - or use lots of build-up primer.
I was fortunate that the Dupli-Color Truck/Van/SUV paint in Flame Red matches my truck very well, but I can not say how well other colors would match. All you can do is paint a test piece and see how it looks. I would suggest doing a full color/clear coat/wetsand/buff of the sample since the color can look different with or without clear coat and with or without the final sand/buff. I painted a small part of one of the old stock wheel well liners I had after I installed the full liners to test the color match.
OK, so this first pic shows all the products I used. These are a must:
1. Rubber gloves, scotch brite pad, tack cloth, several white cotton towels. I used a 12 pack
of 18"x18" or so towels from the auto store.
2. Dawn dish soap, Rubbing Alcohol, Wax/grease remover (Auto prep in the picture)
3. 800 grit sand paper (few sheets)
4. 2000 grit sand paper (at least one sheet per flare)
5. 1 can of Bulldog adhesion promoter, or an equivalent (makes the paint stick to the plastic)
6. 2 16 oz cans of SEM primer (I used high build primer/surfacer since I was not sure how hard it would be to fill the texture in these "smooth" flares). Dupli-Color Truck/Van/SUV primer would work fine as well now that I have done it, but you would probably need 3 12 oz cans vs the 2 16 oz cans that I used. If the flares truly were smooth, then no primer at all would be needed.
7. Dupli-Color Truck/Van/SUV paint (I needed 4 cans of flame red (poppy red))
8. Dupli-Color Truck/Van/SUV clear coat (I needed 4 of those as well)
Optional
1. $4.00 plastic trigger to make spraying the rattle cans less fatiguing
2. 1 12 oz can of SEM black guide coat (or a different color of primer if you have some). I will talk about that below
I picked up the high build primer and guide coat from a local Sherwin Williams auto paint shop, but the rest of the items except for the Bulldog adhesion promoter I picked up at the local Checker Auto parts. I already had the Bulldog from prior projects, but a local auto paint store should have it, or you could find it online. A can lasts for a while because you only need a couple light coats on whatever you are painting.
OK, so the first step is to get a small bucket with some very hot water and a capful of Dawn dish soap. Throw on the rubber gloves (any time you are handling the flares actually) and clean each flare with the scotch brite dipped in the soapy water. You are mainly trying to clean the flares and "scuff" them a bit, but that is about it. Spray them off with a hose, wipe them with a towel and let them dry.
Next get a clean cotton towel and pour some alcohol on the rag and wipe down each flare. Let them dry again and get yet another clean towel and spray some auto prep on the towel and wipe down each flare. I guess the three different types of cleaners on the flares remove different types of containments. Not sure how important this is on new plastic, but it is important for plastic parts that have been on the truck for a while, such as mirrors, spears, etc. If you do not clean them first, and you wanted to sand down the texture, you can embed contaminants into the plastic. I figured what the hey and just used all three.
I set the flares on wood blocks so they were off the ground a bit and finally I sprayed two very light coats of Bulldog adhesion promoter on each flare, waiting about 10 minutes between coats. They emphasize that more is NOT better with this stuff. Here is a pic after the Bulldog:
After about 10 minutes, you can spray the primer. I sprayed a light to medium coat then a couple more medium coats again waiting about 10 minutes between coats.
This step is optional, but was a neat tip I saw on Dodgetalk and elsewhere. If you spray a "mist" coat of contrasting color paint on the primer, it will aid (or guide) you by preventing you from sanding too much of the primer. If you sand just until that contrasting color is pretty much gone, you know you can stop. I bought a $5.00 can of guide coat, but I would think any contrasting primer (red, black, etc) would work just as well. You also do not have to bother doing this step at all if you feel pretty confident of your sanding ability. Here is what it looks like after the guide coat:
I let the primer/guide coat dry for about an hour, then I wet sanded the flares with 800 grit paper. They say 400 grit can be used, but again I was being conservative. I did not bother sanding off all the guide coat - I just pretty much sanded them until they felt pretty smooth. The guide coat just helped me from going too far.
After that I wiped off the wet flares with a new clean towel, let them dry and wiped them down with yet another towel soaked in some wax/grease remover. One thing I noticed, however, is it was hard to paint the sides of the flares when they were so low to the ground, so before I started the red/clear coats, I decided to get some saw horses with some 2 ft or so 1x2s clamped vertically to the horses. I then set the flares one at a time onto those 1x2s (I usually needed three 1x2s - two on one horse and one on the other) and painted them up at chest level, rather than 2" off the ground - much easier.
For the red, I set a flare up on the 1x2's, wiped it down with a tack cloth, then started painting. I did a light coat followed by a couple of medium coats waiting 10 minutes between coats. Since the flares will have a clear coat, do not worry too much about how many coats of red you are putting on - as long as you have a good even color on the flares and none of the primer is showing through that is really all you need. I painted them one at a time and let them sit for about an hour.
One thing you have to watch out for is if you are using one of those plastic triggers for the spray can, some paint can build up on the platic around the spray head and can drop onto the flares. I kept a towel with me and periodically blotted the nozel area to get rid of that buildup. The trigger did work very well - I felt like I could hold the can in a more natural position.
At that point you could wet sand them a bit with 2000 to smooth them out, but I did not bother. If you do get a run or two - don't sweat it, just let them dry for about an hour, then carefully wet sand the runs with 2000. If the paint gets a little too thin, just spray a couple of more light coats of paint in that area, let it dry again and lightly wetsand to blend it in. Again, you do not have to be perfect - it is the final wetsand of the clear that really matters.
After the red is ready and looking pretty good, I just wiped them down again with the wax/grease remover and tack cloth and started spraying on the clear (again waiting 10 minutes between coats). I started with a light coat, followed by a medium coat, then followed by at least 2 medium to heavy coats. The heavier you can make the coats the smoother the finish will be, which means less final wet sanding. Again, if you get a run or two, do not sweat it - it can be sanded out. The more clear you can get on the flares the better since that makes it more forgiving if you sand a bit too much in one area. I was getting better at judging how much paint I could put on as I did each flare and so the last one was quite a bit smoother than the first one (less orange peel), and it was easier to wetsand as well.
Here are the flares after the red/clear coats (those orange spots are the sun reflecting off the flares into the camera):

I then let the flares dry for a day before I started the wet sanding with 2000. I have read that 1200 to 2000 can be used, and if I did it again, I would try 1500 at least if the final clear coat has a pretty good orange peel to it. The 2000 is very safe to use - it just takes longer to get there if you want most of the orange peel removed.
What I did was had a towel handy and as I wet sanded a section of the flare, I would wipe it off and see how the orange peel was coming. I kept at it until most of the orange peel was gone, but to be honest, if you only sanded 75% of the orange peel and rubbed it out, the finish would look at least as good as the OEM paint. Also be careful sanding on any of the edges - I tried to sand up to the edge from both sides and then just lightly sanded the edge itself. I guess the paint tends to be thinner on the edges, so you have to have a lighter touch.
I also only sanded about 50% of the peel on bottom side of the flares since the finish is not as critical there. It still buffs out very well, just not as glossy as to top side. If you have the desire to make it all glossy - go for it!
After all the flares were sanded, I rubbed them out by hand using the 3M rubbing compound. Note that this is NOT the same as that rubbing compound in a can - it is very fine and works well for hand buffing. I just put a nickel sized blob on a clean towel and worked about a 6" section at a time. I was able to buff out each flare in about 3-5 minutes. Again, some elbow grease was all that was needed. I could have used an electric buffer if I had one, but I did not, and since this is a budget how-to ... well you get the idea
Here are some pics of the flares after red/clear, after wetsanding and after hand buffing. Note the reflection of the building and the power wires that are about a 1/2 mile away - the finish is as good as I could have asked for.

After that I just let them dry for a few days in my garage before I installed the rubber seals. You may need to wet sand back to the bare plastic and use some wax/grease remover (like I did) on the backside of the flares in the area where the rubber seal has to stick to the flares with 3M tape. I had some overspray in that area, and I wanted to make sure the tape would stick well. After that I mounted them on the truck and they fit just fine. Even though Dupli-Color does not mention it, I try to wait a couple of weeks before waxing the new paint. Here is how they turned out:

Now - how they will actually hold up only time will tell. So c'mon - go for it and to steal a popular DT slogan ...
Don't Fear the Dupli-Color!


